Tag Archives: vegetables

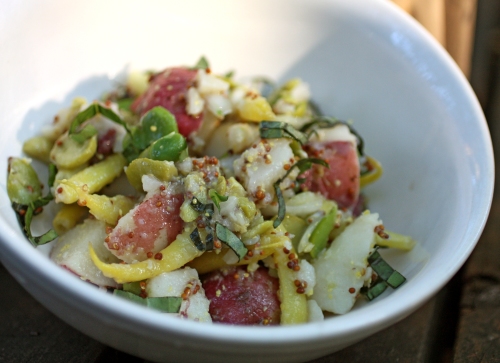
New Potato Salad

Most people think of potatoes as a winter food, but I love them when they are young and thin skinned in the summer. We planted trench upon trench of potatoes in the spring and in the past few weeks have started harvesting new potatoes.  Most people think that new potatoes are just small, red potatoes, but genuine new potatoes are harvested in the summer and have such delicate skins that you can rub them off. These potatoes are the ones you want use in your summer cookout potato salad or throw in a crab or shrimp boil.

In general, I like all types of potato salad, but in the past few years have started to favor ones with a mustardy vinaigrette as the base, instead of mayo. My current incarnation uses large chunks of potatoes, lightly blanched snap beans, and fava beans. This salad bridges the early summer produce (favas) and high summer produce (beans) and uses up all of those bits of green herbs you have. Scallions, parsley, basil, and cilantro are all welcome additions here. If you do not have any favas, fresh (or frozen) lima beans or butter beans would be tasty.

New Potato Salad

2 pounds new potatoes, cubed in largish chunks
3/4 -1 pound fava beans (pre-shelling weight), shelled
1/2 pound snap beans, green or yellow or a mix of both
2 large scallions or 1/2 of a small sweet onion, diced fine
2 cloves garlic, grated on a microphone or mince very finely
1.5 tbsp whole grain mustard
4 tbsp (or to taste) red wine or white wine vinegar
3 tbsp olive oil
handful of parsley, basil. cilantro, or other fresh green herbs, chopped fine
salt/pepper

Place the cubed potatoes in cold water with a handful of salt in a large pot and bring to a boil. When tender, scoop potatoes out from the pot, reserving the water. Bring the water back up to a boil and blanch the snap beans for maybe 30-60 seconds, scoop out from water and plunge into an ice bath or run under cold water. Drain and set aside. Bring the blanching water back up to a boil again and blanch the favas. Drain the favas when they are tender and pop then out of their skins.

In the bottom of a large bowl, whisk together the garlic, mustard, vinegar, olive oil, and salt and pepper to taste. Add the potatoes, beans, favas, and onion and stir to coat. Fold in the chopped herbs and serve warm or cold.

1 Comment

Filed under salad, summer

Borscht

We are solidly in soup season here in Seattle. There is a Russian cafe tucked in Pike Place Market that serves delicious salads, pelmeni, and soups, including a tasty Borscht. I took home a bunch of beautiful beets from the farm the last week and was inspired to recreate this Borscht. The flavors are very clean and light, but the root vegetables make it pretty substantial. Be sure to have some sour cream or Greek yogurt on hand to swirl into the soup to add some richness. Unfortunately, I ran out when I got the chance to photograph this for lunch the next day. Keep tasting this soup as you are cooking and adjust the seasonings so it is a good balance of sweet, salty, and sour.

Simple Borscht

adapted from food52

10 cups water

1 tbsp olive oil

1 medium-large onion, diced

3 medium carrots, chopped small enough to fit easily on a soup spoon

3 large beets, peeled and chopped

1 large or 2 smaller potatoes, chopped

3 small turnips, chopped

1 celery stalk, sliced thinly

1 small bunch of dill, chopped

1 lemon’s juice

1-2 garlic cloves, thinly sliced

salt, pepper

10 juniper berries, optional

sour cream or greek yogurt for serving

Set the pot of water over low to medium heat. Add the juniper berries, oil, and 1-2 tsp of salt. Add the onions, beets, carrots, potatoes, turnips, and celery. As the vegetable soften, skim the foam off of the broth. When you can easily pierce the vegetables with a fork, add the lemon juice and dill and taste and adjust the seasoning. Add the thinly slice garlic right before turning the heat off. Serve hot or cold, with sour cream or yogurt.

Leave a comment

Filed under gluten free, quick, soups, vegetables

bulgur and tomato salad

Here is a simple, quick salad that can be eaten warm or cold. This salad straddles the seasons, using the last of the ripe tomatoes before the fall sets in completely and some of the first sweet fall carrots. Bulgur or cracked wheat is perfect for a quick supper because it only needs to be rehydrated with some boiling water. In addition to eating it plain, I stuffed this mixture inside of swiss chard leaves and baked it for 20 minutes under a blanket of smoked mozzarella. As always, you can easily swap out or omit whatever the vegetables, cheese, or herbs, but I like to always include the golden raisins and a couple of handfuls of freshly chopped parsley and basil.

Bulgur and Tomato Salad

adapted from Passionate Vegetarian

1 cup of dried bulgur

2 cup boiling water

1 large sweet onion, diced fine

3-4 small carrots, diced fine

3 cloves garlic, minced

1 chile pepper, minced

3 tomatoes, diced and peeled, if you chose

1 lemon

herbs: big handful of parsley or basil. Other good choices (in smaller amounts) include mint or oregano

1/2 cup golden raisins or currants

cheese of your choice. I used a light grating of smoked mozzarella, but crumbled feta would be very tasty. Or use diced avocado for vegans.


Rehydrate the bulgur by pouring the boiling water over the dry bulgur. Cover and let it sit for about 20 minutes. Meanwhile, heat a saute pan over medium high with a bit of olive oil and start to saute the onion and carrot. When soft, add the garlic and chile pepper and saute for another minute. Add the diced tomatoes and cook until the juices start to bubble. Pull off the heat and add the zest and juice from the lemon. Stir in the herbs and raisins or currants. Let the mixture cool for a bit and then add the cheese or avocado, if using. Season to taste and enjoy.

Leave a comment

Filed under from the pantry, grains, quick, tomato, vegetables

garlic dill pickles

As I continue my foray into the world of food preservation, I knew that I wanted to make pickles. Previously, I have made quick pickles like pickled red onions for sandwiches or lightly pickled radish slices, but this year was the year that I would put up enough cucumber pickles, dilly beans, and other vegetables to snack on all year until next summer.

We are still growing a lot of cucumbers here in Seattle and will continue until the first frost. While there are lots of variants on cucumber pickles, I wanted to can some classic garlic dills first. Once you commit to the idea of canning, everything for this recipe/technique is super simple. For cucumbers, you can cut them into spears (shown here) or chips. Chips are easier to fit into pint jars and absorb the brine faster. To streamline thins even more, you can purchase a pickling spice mix instead of purchasing lots of spices separately. However, most of these spices I usually have on hand anyways. Feel free to play around with the spices or add some herbs or red pepper flakes for some heat.

My favorite canning blog Food in Jars has been enormously helpful as I learned to can. She shows you that you don’t need a huge amount of space or produce to start preserving and i can definitely vouch for that.

Garlic Dill Pickles

Adapted from Food In Jars

Note: If you don’t want to process any jars, you can just turn these into refrigerator pickles. If so, you can use regular sea salt or kosher salt instead of pickle salt, let them cure in the refrigerator for at least a day and eat within a month.

Makes 8 pints

2 generous quarts of pickling cucumbers, washed, trimmed, and sliced into shape of your choice.

4 cups vinegar (I used a combination of apple cider and white vinegar)

4 cups water

4-5 tbsp pickling salt

about 16 cloves of garlic, peeled maybe halved if large

dill seed, black peppercorns, pickling spice mix, red pepper flakes, or herbs or spices.

Sterilize your jars. Since I do not have a dishwasher, I usually bring them to a boil in my canning pot. When the water is boiling, I add the rings and lids and turn off the heat. Meanwhile, bring the vinegar, water, and salt to a simmer in a saucepot. Taste to see if you need more salt or not.

Pull out the jars and place two garlic cloves in each jar. Sprinkle in 1 tsp of dill seed, a good pinch of red pepper flakes, 1/2 tsp of peppercorns, or about 1.5-2 tsp of pickling spice per jar. Sometimes I add a sprig of thyme or rosemary, maybe a bay leaf, or a few slices of green onion to the bottom. Fill the jars up with the cucumbers. Pack them in tightly! Pour the hot brine over the cucumbers, leaving 1/2 inch headspace.

Wipe the rims, apply the lids and rings, and place them back into the water bath. Process in boiling water for 10 minutes. Start the timer AFTER the water comes to a boil. After 10 minutes, remove the jars and cool on the counter. Listen for the pings! and check for seals when jars are cool.

If making refrigerator pickles, just skip the water bath and store in fridge once the jars are cool.

1 Comment

Filed under pickle, summer, vegetables

summer squash gratin

After our trip to the u-pick vegetable farm over labor day weekend, we came home with 10 pounds of summer squash and zucchini. Summer squashes seem to be priced somewhat high here in Seattle so I haven’t had the chance to get tired of my usual ways of preparation. Gratins are a good way to use up lot of vegetables, especially if you like crispy breadcrumbs and melty cheese. I really liked this recipe because it added flavor with a salsa verde and not with lots of cream or butter. The only unfortunate part about this recipe is the amount of dishes involved to make seemingly one dish (food processor x2, mandolin, colander, several bowls, a small skillet), but the results are so tasty that I wouldn’t mind making this again at all.


Summer Squash Gratin

adapted from food52

note: I didn’t have any gruyere on hand and instead used some soft goat cheese (chevre) and delicious goat gouda. The gouda is not super melty like gruyere, but I really liked the combination of the pillowy soft goat cheese with the sharper, earthier gouda.

Also, I used a bigger gratin dish to accommodate more squash and more crispy topping, but the recipe recommended using a 9″x9″ pan.

2 pounds summer squash/zucchini, thinly sliced on that mandolin

1.5 c fresh breadcrumbs (i used whole wheat)

2 tbsp butter

handfuls of your cheeses of choice; i used goat cheese and gouda

small handful of capers, roughly chopped

sprinkle of thyme leaves

salsa verde:

1 stem of oregano with the leaves stripped off

1 stem of mint with leaves stripped off

1 large bunch parsley, destemmed

small handful of basil

2 cloves garlic, peeled

1 hot chile pepper of your choice, seeded

1 tsp miso paste (i use this a lot for some umani)

1/2 large lemon, both zest and juice

olive oil

Toss the sliced squash with a generous pinch of salt and set to drain in a colander, about 10 minutes. Drain and shake off excess moisture.

Preheat the oven to 400 degrees.

In a small food processor, make the salsa verde. Combine the herbs, garlic, chile, miso, and lemon juice and zest. With the processor running, stream in the olive oil until smooth. Sometimes, in order to save some money and calories, I use a bit of veg broth, but don’t tell anyone! Season well.

Toss the sliced squash with the salsa verde in a large bowl. In a small skillet, brown the butter and toss in the bread crumbs. Butter the gratin dish and layer in the prepared squash. Sprinkle with capers and thyme leaves. Dollop on the goat cheese, if using, and sprinkle on the firmer cheese. Finish with a layer of breadcrumbs. Bake for about 30-40 minutes or until the squash is tender, cheese is melted, and the breadcrumbs crispy.

1 Comment

Filed under cheesy, gratin

shredded zucchini salad

Hmmm… Doesn’t this look familiar? I was hesitant about posting this because this salad is quite similar to the one that I made last summer. However! This zucchini salad is tossed in a tangy Greek yogurt based dressing and diced avocado, two of my favorite things. Summer was slow to start here in the Pacific Northwest, but this week looks awesome. When the sun is shining and you can leave the house without a rain jacket, everyone in Seattle seems to stand taller and smile a whole lot more.

This (very) easy salad is easy to adapt to whatever you have in your pantry. Add some shaved cheese, change out the herbs and nuts, use different types of squash, etc. One note: the dressing and salt do break down the squash a bit and release some liquid. If serving fancy people, drain it off before eating. Serve with tomato sandwiches for a complete summer experience.

Oh, and those bay leaves in the background are from a garden that I have been volunteering at. A garden with blackberries, marionberries, raspberries, and strawberries that I have been studiously consuming while I am suppose to be weeded. And! yesterday I was given 8 perfect basil starts of all types! Wish I had a p-patch here to plant them.

Shredded Zucchini Salad, part two

2-3 small or medium zucchinis, julienned on the mandoline

1/4-1/2 cup finely mined fresh green herbs (parsley, basil, dill are all good options)

1 large avocado, diced and tossed with a bit of lemon/lime juice

1/3 cup Greek Yogurt

2 tbsp(ish) sherry vinegar or red/white wine vinegar or lemon/lime juice

2 tbsp olive oil, good quality preferred in this application

salt/pepper

handful of almonds, toasted and chopped

Whisk the dressing together in the bottom of your serving bowl. Combine yogurt, vinegar or lemon juice, olive oil. and salt and pepper until smooth. Toss with the shredded zucchini, herbs, and avocado. Taste and season well. Right before serving, top with the chopped, toasted almonds. Enjoy!

2 Comments

Filed under gluten free, quick, summer, vegetables

raw kale salad

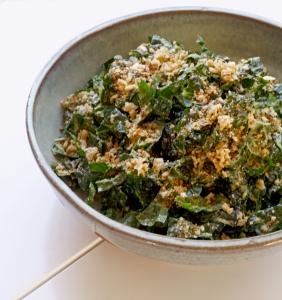
Kale is my most favorite vegetable. We usually eat at least two or three big bunches of it a week. Now that it is summertime and I really don’t want to turn the stove on, we eat a variation of this kale salad more often than I care to admit. After all, I am suppose to be running a food blog and trying all of these new recipes all the time, right? However, when it is summertime, especially in the Pacific Northwest, I generally eat a lot of fresh and raw foods and about 75% of my diet is berries.

This kale salad is way tastier than you think it will be. Lemony, cheesy dressing, crispy breadcrumbs, and pleasantly chewy kale? Yes, please.

A Raw Kale Salad

1 bunch of lacinato (aka dino, tuscan, or black) kale, washed, stems stripped, and sliced into think ribbons

1 clove of garlic, peeled and grated with a microplane

1 lemon

2 tbsp (or more) grated parmesan cheese OR nutritional yeast (this is a fairly common vegan ingredient and can be found at whole foods or similar stores, and it really tastes sort of cheesy)

big pinch of crushed red pepper

olive oil, salt and pepper

fresh bread crumbs, well toasted and crispy

Make the dressing:

In the serving bowl, grate in the garlic and the zest from the lemon. Add the lemon juice, red pepper, cheese/nutritional yeast, and a generous pinch of salt and pepper. Whisk in olive oil, a couple of tablespoons, until the dressing is thinned out. If you need more liquid, add a bit of water or vegetable stock. Toss the kale in the dressing. You can let the kale marinate and break down a bit or just serve it as is. Top with the toasted bread crumbs and enjoy!

Note: Sometimes, I add a ripe avocado to this, by mashing 1/3 in with the dressing and cutting the rest into small cubes and add it to the salad with the kale. The acidic dressing will keep the avocado from browning.

Oh, and I have starting making this summer’s jams! Today i made this delicious vanilla rhubarb jam. Yum.

2 Comments

Filed under cheesy, greens, quick

yellow split pea and winter squash curry

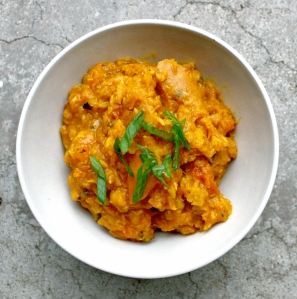
the past few weeks were incredibly cold for houston.  high of 30?  terrible.  in order to make up for these temps, i just made some curry.  i actually got the idea for this warming stew by watching the food network while at the gym on the terribly named show aarti party.  aarti (a winner of the next food network star) gives smart and modern ways of incorporating indian spices and flavors into your everyday cooking.  i am not sure how authentic this combination of winter squash and yellow split peas are, but i can guarantee that is very tasty.  this dish takes awhile on the stove to soften the peas and cook the squash, but it is a one pot, throw it all together affair that will definitely reward your patience.

yellow split pea and winter squash curry stew

inspired by aarti party

1 large winter squash (i used a red kuri squash but butternut, hubbard, or any other orange winter squash will be fine.  i also have used 3 large sweet potatoes before with very good , if slightly sweeter results.)

1 onion diced

1/2 of a can of diced tomatoes

2 cups yellow split peas or 1 cup of yellow split peas and 1 cup red lentils

1/2 c dried unsweetened shredded coconut

1.5 tsp ground cumin

2 tsp turmeric

enough vegetable stock or water to cover

peel and cube the squash into 1 inch cubes.  in a large soup pot, heat a tablespoon or so of canola oil, ghee, butter, or coconut oil over medium heat and add the onion and cook until softened.  add the spices and cook until fragrant.  add the cubed squash, tomatoes, coconut, and split peas and cover with vegetable stock or water.  season.  bring to a boil and turn down to a simmer and let it cook through until the peas have softened and the squash has fallen apart (maybe 30 minutes or so.)

when the stew has reached this stage, prep the finishing oil and seasonings:

1-2 tbsp canola or coconut oil

1-2 tsp brown mustard seeds

2-3 cloves of garlic minced

1 tsp red pepper flakes (or more)

1-2 tbsp honey

1-2 limes of juice

cilantro, as much as you want

heat the oil in a small skillet until shimmering.  add the mustard seeds, garlic, and red pepper flakes.  cook until the garlic is starting to brown and the mustard seeds begin to pop.  add this to the stew.  taste this and begin to season with salt, honey, and lime juice.  finish with minced cilantro and enjoy.

1 Comment

Filed under curry, legumes, soups, spicy, vegetables

corn pesto

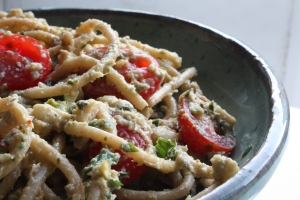
cancel all plans and make this for dinner/lunch/supper!  it is sweet corn season!  after eating cob after cob, this pesto is something different but familiar and can only be made in the summer with fresh sweet corn cut off the cob.  this pasta dish takes advantage of all of the things i look forward to in the summer, namely corn, tomatoes, and basil.  it is quite similar to traditional pesto but with the addition of corn.  the starch from the corn makes the sauce naturally very creamy and sauces the pasta quite easily.  i added halved cherry tomatoes to the mix for some brightness and acidity, but you can leave them out or add other ingredients like a bit of chopped olive, roasted peppers or summer squash, or if you eat it, bacon.

pasta with fresh corn pesto

adapted from bon appetit

corn cut from 4 ears of corn

1 shallot, minced

1 clove garlic, minced

handful of walnuts or pinenuts

olive oil

parmesan cheese

very large handful of fresh basil, chopped

your choice of pasta (use a long type of noodle like linguine, tagliatelle, or, in a pinch, spaghetti will do)

3/4 of a pint of cherry or grape tomatoes, halved

heat a skillet over medium heat with about a tablespoon of olive oil and sautee the shallot and garlic until translucent.  add the corn and turn up the heat a bit and cook until the corn is tender.  transfer most of the corn (reserving maybe a cup or so) to a food processor or blender.  add the nuts, generous shaving of Parmesan cheese, handful of basil, salt, pepper, and a nice glug of olive oil.  blender or process until mostly smooth.

meanwhile, cook the pasta until al dente and drain, reserving a cup or two of the pasta liquid.  toss the pasta with the pesto and tomatoes, adding as much cooking liquid needed to thin everything out to the proper consistency.  sprinkle the remaining basil and serve with more Parmesan if needed.

*note:  this is also very tasty cold the next night sitting at the park during sunset.

1 Comment

Filed under Uncategorized

spring stew

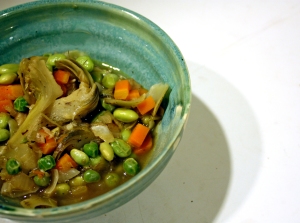
a vegetable that i love but hate to prep is the artichoke.  the season for artichokes is nearing the end so i thought i should buy and cook a few before it was too late, since almost all artichokes in the us are grown in california.  i was thinking about roasting them, but didn’t want to turn the oven on for just a few artichokes.  the weekend was particularly blustery so a comforting warm bowl of soup was welcome.  a look inside of the fridge revealed all of the ingredients for a classic spring vegetable stew.  i used frozen shelled edamame and peas instead of fresh favas and fresh english peas because i am moving soon and want to eat everything in my fridge and pantry.  i, however, did use a couple lovely, sweet, new carrots with the greens still attached.  i wish i had fresh parsley and mint to toss in the end to provide a bit of lift, but even without, this was pretty tasty.  this is a really brothy stew that goes well with a crusty heel of bread.  just be sure to be aggressive when prepping the artichokes other wise their will be tough fibrous artichoke leaves floating around; nothing terrible but quite annoying to eat.

spring vegetable stew

adapted from smitten kitchen

(if you like food and pretty pictures (and if you don’t, who are you?) visit this blog)

4 medium artichokes prepped to the point that you remove the choke and sliced into eighths (please refer to here for all of the steps and dont be alarmed at the pile of trimmings for your compost bucket)

3 smallish carrots, diced

2 green garlic stalks sliced

1 small onion diced

1 cupish shelled fava beans or frozen edamame

1 cupish fresh or frozen english peas

1 large lemon

handful of chopped parsley and mint

large pinch of dried thyme or a sprig of fresh thyme, stripped

while prepping your artichokes, be sure to have a bowl of water with some lemon juice to keep the artichokes from browning too much.  when everything is prepped, heat a heavy bottomed skillet or small dutch oven over medium heat with enough olive oil to cover the bottom.  add the carrots, onion, and green garlic and saute until the onion is translucent.  add the artichokes and thyme, and season.  add enough vegetable stock to almost cover all of the vegetables and bring the heat down to simmer.  let the artichokes cook until nearly tender (maybe 20 minutes?)

if you are using favas, par boil them while the artichokes are simmering.  add these (or the edamame) to the artichokes along with the peas and simmer until just cooked.  check the seasoning and turn the heat off and add the fresh herbs.  serve with some bread and maybe a bit of goat cheese.

Leave a comment

Filed under Uncategorized